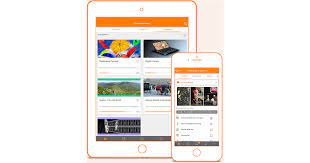
Adapting traditional classroom training to interactive e-learning is a frequent goal of many of the clients we work with at Enovation. The benefits e-learning brings in terms of cost, scale, availability, and how easy it is to update, make adapting existing courses a simple decision. Couple this with the tried and tested content, that classroom instructors are familiar with and used to providing, means that more organizations are choosing this path all the time.
Of course, it can be a daunting process taking the first steps in your e-learning journey, and it isn’t always clear what the best way to proceed is, and what problems you may face along the way.
We are going to take a look at some steps you can take when adapting a traditional instructor lead course, which will help you keep the value in your materials, and in turn ensure your learners get the most out of their time spent taking your courses.
#1 – Conversion
Before discussing the actual conversion it is important to realize there are several different levels of conversion. The first, and easiest to achieve, is a low-level conversion. Here, you import your existing slide deck into a piece of software capable of wrapping it as a SCORM (such as Articulate Storyline), and upload it to your LMS (such as Moodle or Totara). This will give you some of the benefits of e-learning mentioned above. Your course will be available online in a trackable setting and can be accessed by any of your learners at any time. However, you have not improved the original materials to best suit the new format of delivery. As such, you are not presenting your learners with materials which will best engage them, and make learning in this new format a truly enjoyable and engaging experience.
With this in mind, the type of conversion we will be looking at will be more fully-featured translation from the original. This will give you the benefits mentioned above, but also bring your classroom training to life, and truly engage your learners. We will achieve this using interactivity, knowledge checks, best practice in Instructional Design and more. Think of the process we are describing like adapting a novel into a movie. Low-level conversion is more akin to the screenplay.
#2 – Needs analysis
Just as with a course we are designing from the beginning, the first step is a needs analysis. We need to consider whether the original classroom training, online courses objectives and constraints match.
For instance:
• Do we still share the same learning objectives as the original classroom course?
• Was the classroom course delivered over the same time frame? You will struggle to condense a 1 day classroom course into a 20 minute eLearning course
• Will you want to localize the online course?
• How will we measure learning outcomes?
• How will you know if the goal of the course has been met?
#3 – Pacing
Should you condense or expand information from the original course? The usual length for optimal information retention in an online course is between 15 and 30 minutes. If our new course will be longer than this, we should consider whether to break it into multiple parts.
Now that we have an idea of what we have to work with and what we want, we can start the fun part!
#4 – Gagne’s 9 Events
Gagne’s 9 events are an instructional design process, with a focus on the outcomes or behaviors of instruction or training. Keeping these principles in mind when adapting your courses, will ensure that they follow best practice for an effective learning programme.

#6 – Use the learning objectives to create knowledge checks
One popular way to keep learners engaged is to include periodic knowledge check questions to reinforce key points throughout the course. A good way to introduce these is using your learning objectives, as it ensures they are focused on the key learning outcomes you want your learners to achieve. By keeping them focused on your learning outcomes, it should also ensure a good interval between questions.
#5 – Information Chunking
Chunking your information into bitesize pieces is the first step towards interactivity, from here you or your designer can decide how best to represent the information onscreen.
Chunking information allows you to go from this…
To this!


#7 – Leverage your existing design
Your existing theme, colours and style can be extended to create your interactive elements, such as buttons, graphics, shapes and backgrounds. This will both make your design process more efficient, and ensure that the final design is more representative of your company’s branding. It will also be more familiar to your learners. The learner will have an experience regardless of whether it is intended or not, so you need to make sure that the experience is a positive one.
#8 – Add media
An e-learning course’s visual design is a powerful tool for setting the tone, communicating key concepts, and engaging your audience. One of the joys of e-learning is that it opens up the possibilities of new media use to help convey our message in a fun compelling way. Consider adding an audio track for important slides, or a video introduction or summary. Imagery and diagrams are a great way to add depth and reach out to visual learners.
#9 – Characters
Another great way of adding visual interest and increasing buy-in for your new e-learning course is to use a character throughout. Your choice of character must be relatable to your audience. Typically, there are 2 widely used types of character. One representing the learner, who goes on the learning journey through the course and asks key questions at appropriate times. Or a teacher who explains the concepts.
Final steps
There is no universal roadmap for adapting classroom learning to e-learning. Just as everyone’s learning goals and learner types are different, so are their learning journeys. But by following the steps above you will be on the right road on your e-learning path.
We would be delighted to hear your thoughts on adapting your traditional classroom based courses into e-learning. If you would like to discuss your e-learning journey, please contact us.